The best software for streaming Warcraft 2 is Open Broadcaster Software – we have a guide explaining how to set it up here. However some computers (especially laptops) won’t be able to use OBS because of this error:
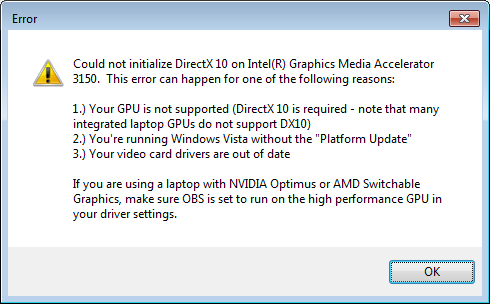
If that happens you can read this alternate guide to set up streaming with FFSplit, a different free streaming program.
This article covers the following:
Initial Setup
- If you don’t already have a Twitch.tv account, register here.
- Download FFSplit and install it. If you get a prompt about FFmpeg click “OK” to download & install it automatically.
- If you don’t know your Internet connection speed visit SpeedTest.net and click “Begin Test”. Make a note of your UPLOAD speed (download speed doesn’t matter for this guide).
Configuring FFSplit
- The first time you launch FFsplit this window will open (you can also access it later via File > Options):
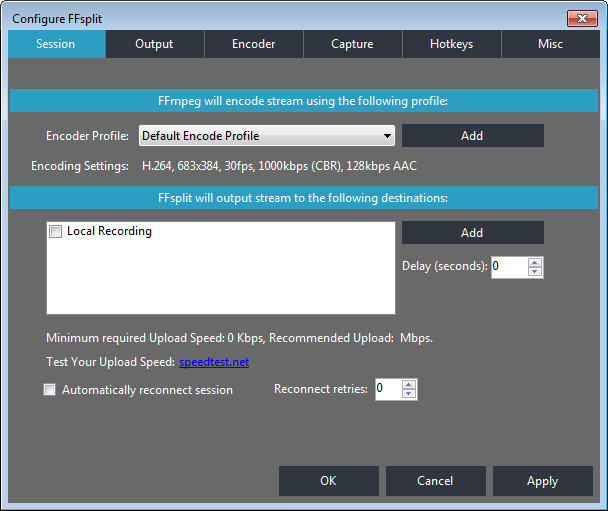
- Click on the “Output” tab at the top, then click on the “New” button beside “Output Profile” and type “Twitch” in the box. Adjust the following settings:
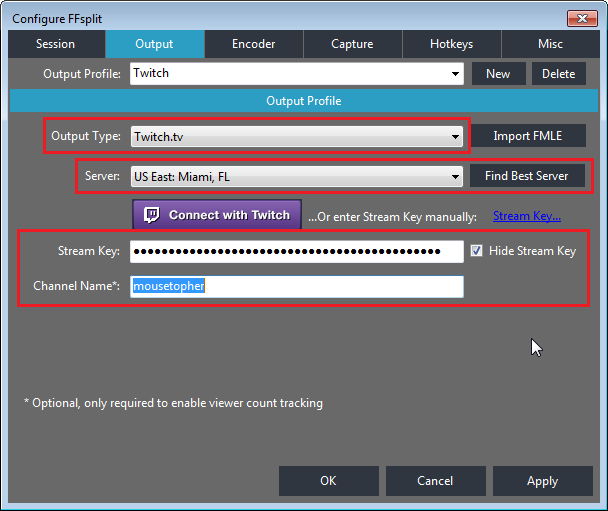 Output Type: Twitch.tv
Server: Select the option nearest your location or click “Find Best Server”
Stream Key: Go to this page and click “Show Key”, then copy & paste your key here. (Note: your stream key isn’t your Twitch password!)
Channel Name: Your channel/username on Twitch - Click “Apply”, then click the “Encoder” tab at the top. Click on the “New” button beside “Encoder Profile” and type “Warcraft 2” in the box. Adjust the following settings:
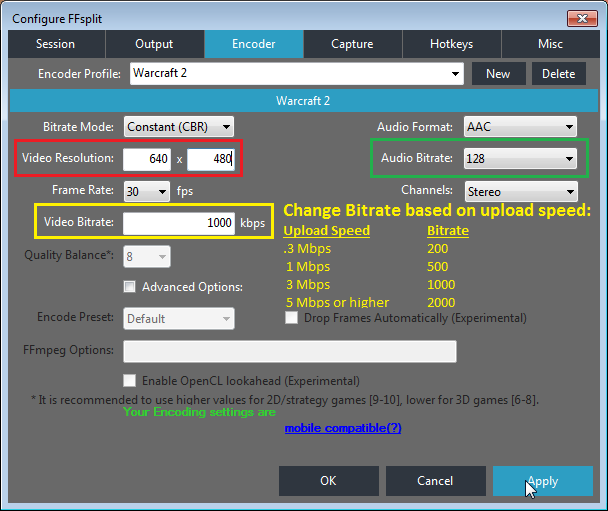 Video Resolution: change to 640×480 (Note: if using Windows 8+ set this to your default screen resolution)
Video Bitrate: adjust the number based on your upload speed (see image)
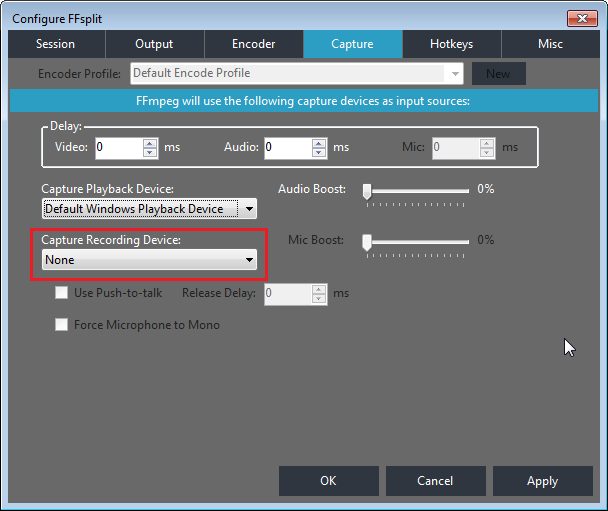
Audio Bitrate: if you have a low upload speed change to 64 - Click “Apply”, then click the “Capture” tab at the top. You shouldn’t have to change any settings here but if you don’t want to use your microphone select “None” in the “Capture Recording Device” drop-down menu.
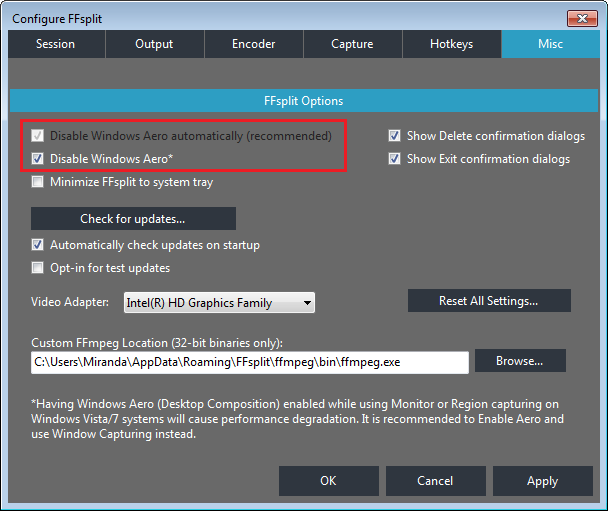
- Click “Apply”, then click the “Misc” tab at the top and check both boxes for disabling Windows Aero:
- Click “Apply”, then click the “Session” tab at the top and adjust the following settings:
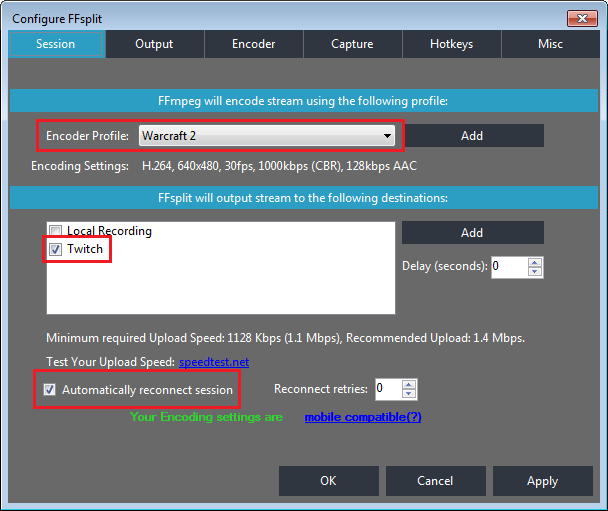 Encoder Profile: select “Warcraft 2”
Check the box beside “Twitch”
Check the box beside “Automatically reconnect session” - Click “OK”
Setting Capture Device (Windows 7)
Part 1: Install UScreenCapture
- Download UScreenCapture and install it.
- Download uscreencapprog_remove_cursor.zip. Open it, go inside the folder “uscreencapprog” inside the zip archive, go to C:\Program files (x86)\UnrealStreaming\UScreenCapture and copy+paste the files inside “uscreencapprog” there. This is required to fix colors. If you did it right it will ask you to replace some files – replace them.
Part 2: Configure New FFsplit Layer
- After you click “OK” the main FFsplit window will appear:
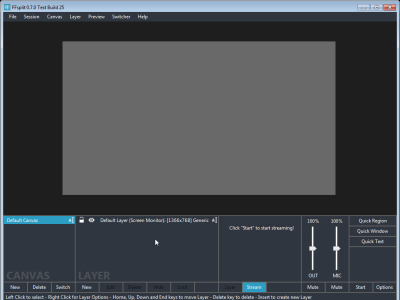
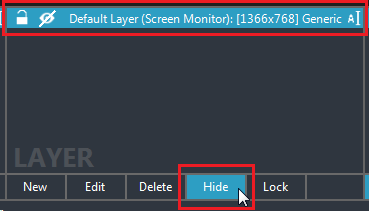
- Find the section labeled “LAYER”, click on the “Default Layer” then click the button beneath it that says “Hide”. You should see a line appear through the eye icon.
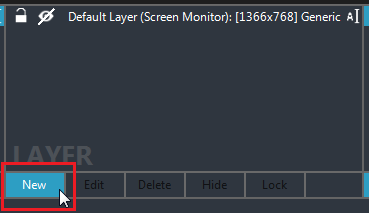
- Next click the button that says “New”.
- Adjust the following settings in the box that appears:
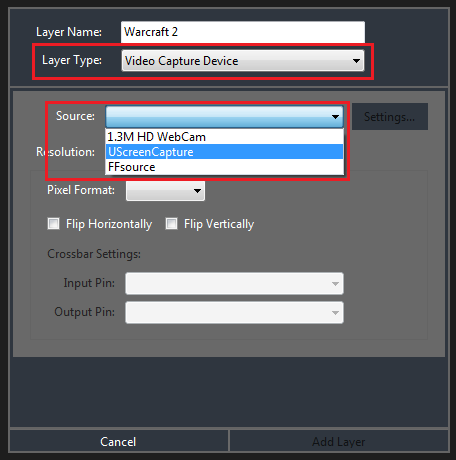 Layer name: Type “Warcraft 2” in the box
Layer type: Select “Video Capture Device” from the drop-down menu
Source: Select “UScreenCapture” from the drop-down menu - The following window should pop up (if it doesn’t, click on the “Settings” button beside Source):
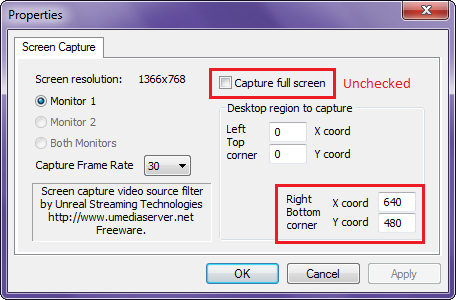
- Make sure your settings match what’s shown then click “OK” and “Add Layer”.

- Next, download uscreencapture.reg, double click it and select “Yes” for all the prompts. This fixes a bug with UScreenCapture and is required every time you change the resolution.
That’s it! When you’re ready to stream click on the “Start” button in the bottom right corner of FFsplit:

If you receive a firewall prompt check both boxes and click “Allow Access”.
Setting Capture Device (Windows 8+)
- After you click “OK” the main FFsplit window will appear:

- Find the section labeled “LAYER”, click on the “Default Layer” then click the button beneath it that says “Edit”.
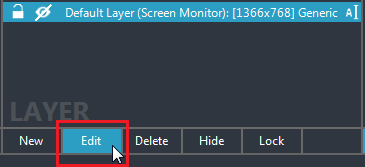
- Adjust the following settings in the box that appears, the click “Apply”.
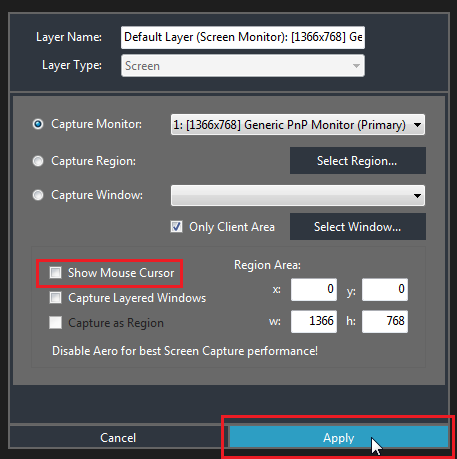
That’s it! When you’re ready to stream click on the “Start” button in the bottom right corner of FFsplit:

If you receive a firewall prompt check both boxes and click “Allow Access”.
Optional Last Step: Quick Text
An optional last step is to add a text overlay to advertise War2.ru on your stream.
- Click on the “Quick Text” button in the bottom right corner.
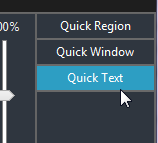
- Enter the text you want to use in the box that pops up, then click “OK”.
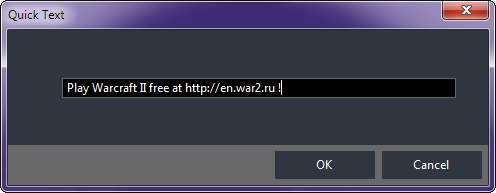
- The text will appear at the top of the preview window. Grab the corner of the text box and drag to resize it to the desired size.

- Hover your cursor over the text box until the crosshairs appear, then drag it to the desired position on the screen.

That’s it! Thank you for supporting the community!
Final Tips
For Twitch to save your videos you must enable the “Archive Broadcasts” feature. Once enabled Twitch will save all your past broadcasts for two weeks, then automatically delete them. During that time you can Highlight or Export them — Highlight lets you select a portion of the video to save permanently on Twitch, and Export uploads the video to YouTube. (You can also export Highlights after you create them.)
If you’ve adjusted your settings based on the guide above and your stream still lags try downloading and running iL’s CPU Savior app.
Don’t forget to give your Twitch channel & Warcraft 2 usernames to mousetopher so your stream shows up on War2TV!


Great and concise guide as always. Good work mousey!
Thanks lb :)
● Easy streaming and recording tools make getting started with OBS simple and straightforward, so you can begin streaming or recording your content right away! This makes it ideal for both beginner broadcasters looking for an all-in-one solution that’s intuitive enough they won’t have to read through pages of manuals before getting started, as well as more experienced users who might prefer something simpler than more advanced programs like XSplit Broadcaster (XSplit) or Wirecast (Wirecast).